Best Tools for Creating Technical Tutorial Videos

So, you’ve decided to make a technical tutorial video. Maybe to teach people how to use that awesome software you love, or maybe because you enjoy explaining things and secretly want to become the next Bob Ross of screen recording. Either way, welcome!
Creating these kinds of videos can seem overwhelming at first (cue dramatic sigh), but trust me: with the right tools, it becomes a whole lot easier and honestly, kind of fun. Whether you're showing someone how to navigate a tricky interface, animate a diagram, or just want to make your cursor do cool little zoom-ins, the magic happens when you’re working with the right gear. In this guide, I’ll walk you through the best tools for each stage of the process: recording, animating, editing, narrating, and sharing your masterpiece with the world. Don’t worry, we’re sticking to beginner-friendly, wallet-approved options (free is what we all love), and I’ll go through the pros and cons so you don’t have to play software roulette. Let’s get rolling!
Screen Recording & Live Demo Tools
To show software in action, you need a reliable screen recorder. The tools below make it easy to capture your screen (and often your webcam) for demo videos and tutorials:
-
OBS Studio (Free, Windows/Mac/Linux): A powerful open-source screen recorder beloved by gamers and tutorial creators. It supports complex scene layouts, multiple sources (screen, webcam, audio), and produces high-quality video files.
- Pros: Completely free with no time limits or watermarks, and highly customizable (you can add overlays, transitions, and do live streaming). It has extensive community support and plugins for added features.
- Cons: Steeper learning curve for newcomers. The interface can be overwhelming at first, and getting the settings right takes time. Also, OBS doesn’t include a video editor, so you’ll need a separate tool to polish your footage. It can be resource-intensive on older or low-end computers.
-
Camtasia (Paid, Windows/Mac): An all-in-one screen recording and editing tool popular for professional tutorials. It lets you record your screen or slideshows and then edit the footage in the same app.
- Pros: High-quality, reliable screen recording with a very intuitive editor built-in. Camtasia provides annotations, callouts, cursor highlight effects, and even interactivity (quizzes, clickable links) for engaging tutorials. It’s frequently praised for being beginner-friendly yet powerful enough for pros.
- Cons: The major downside is cost is that Camtasia is a premium tool (though a free trial is available). It lacks real-time collaboration features and can take a while to render large projects. If you’re on a tight budget, a free alternative like OBS or ActivePresenter might be better.
-
ScreenPal (formerly Screencast-O-Matic) (Freemium, Windows/Mac/Browser): A lightweight, easy-to-use tool for quick screen recordings. You can capture your screen, webcam, or both, right from your browser or desktop app.
- Pros: Very simple interface, which is perfect for beginners who want to hit record and go. It has options for basic editing, annotations, and captions. You can publish directly to YouTube or save locally, which is handy for sharing tutorials fast. The free version allows up to 15 minutes recording, which covers many tutorial needs.
- Cons: The free version adds a small watermark and lacks some features (like drawing tools or advanced editing). It’s not as feature-rich as OBS or Camtasia. It is meant for simpler projects. For longer videos or more polish, you’d need to upgrade to a paid plan (which is still affordable).
-
Loom (Freemium, Windows/Mac/Linux): A video messaging app that doubles as a quick screencast tool. Great for making short tutorial clips or explanations to share via link instantly.
- Pros: Incredibly easy setup. Cclick record and your video is uploaded to the cloud automatically. Sharing is as simple as sending a link (viewers can even add time-stamped comments). Loom’s interface is minimal and friendly for novice users. It also integrates with Slack, Notion, and other workplace tools for feedback workflows.
- Cons: The free plan limits you to 5-minute videos and a certain number of videos, so it’s really geared toward short content. Editing features are very basic (mainly trimming). Also, you need to use the Loom app or extension. You can’t adjust many recording settings, which advanced users might find restrictive.
Other Honorable Mentions:
- ActivePresenter (Windows/Mac): A free-for-personal-use screen recorder and e-learning editor that’s great for longer tutorials. It’s like a free Camtasia alternative with a decent editor, though the interface is a bit complex.
- QuickTime Player (macOS): Built-in tool for quick captures on Mac.
- CleanShot X (macOS, Paid): Known for efficient and high-quality screen capture on macOS.
- Xbox Game Bar (Windows 11): Provides basic screen recording with no extra software, though it lacks editing capabilities or the ability to record certain windows.
Animated Explainer Video Tools
Sometimes you need more than a live demo. Maybe an animated diagram, an infographic, or a cartoon to explain a concept. Animated explainer video tools help you create engaging visuals without needing advanced animation skills. Here are some top picks:
-
Vyond (Paid, Cloud): Formerly GoAnimate, Vyond is a professional online tool for making polished animated videos. It offers a huge library of modern templates, characters, and pre-made animations so you can create scenarios and explainers that look top-notch.
- Pros: Extremely user-friendly drag-and-drop interface with professional-looking results – even if you’re not an artist, you can build scenes that have custom characters and slick animations. It supports different styles (contemporary, business, cartoon, etc.) and has a rich library of icons and sound effects. Many users praise its high usability and modern graphics as worth the higher price.
- Cons: Cost is the biggest con. Vyond is expensive (it’s aimed at businesses). There’s no free plan, only a trial. Also, some advanced customization (like importing your own fonts or assets) is only available in higher-tier plans. If you only need a simple explainer occasionally, the price might be hard to justify.
-
Animaker (Freemium, Cloud): A popular web-based animation studio that’s geared towards beginners. Animaker provides templates for creating everything from animated presentations to Instagram videos, but it’s especially handy for cartoon-style explainers.
- Pros: Intuitive interface: Animaker is often praised for being even easier to learn than Vyond. It has a clean, friendly UI and plenty of free templates to get started. Good selection of characters, icons, and pre-animated assets on the free tier. You can quickly make an explainer video by customizing text and choosing animations, with no design experience needed.
- Cons: Its library of graphics is a bit limited compared to Vyond. If you have very specific style requirements, you might find Animaker’s assets too basic. The free plan exports are capped at lower quality and include a watermark. Also, heavy projects can sometimes feel sluggish since it runs in your browser.
-
Powtoon (Freemium, Cloud): One of the earlier explainer video makers, Powtoon lets you create slideshow-style or cartoon animated videos. It’s aimed at educators, marketers, and anyone who needs to animate an explanation easily.
- Pros: Lots of templates and assets included. You get access to many stock illustrations, characters, and even stock video clips and music with a paid plan. Good for making presentation-like videos or animated infographics with its drag-and-drop canvas. Powtoon is quite versatile: you can create whiteboard-style animations or standard animated scenes with text and characters.
- Cons: The interface can feel a bit cluttered or “messy”, as some users report. There’s a learning curve to figure out all the timeline layers vs. simpler tools like Animaker. The free version has significant limitations (like 3-minute videos and Powtoon branding). Also, certain advanced features (like third-party fonts or longer exports) might require paying extra, which can be frustrating when you bump into those limits.
-
VideoScribe (Paid, Windows/Mac): A tool specialized for whiteboard-style explainer videos (where a hand draws or writes on the screen). VideoScribe has a library of hand-drawn illustrations and text animations, making it easy to produce that classic “sketching on a whiteboard” effect for your tutorial.
- Pros: If you love the whiteboard animation aesthetic, VideoScribe provides it out-of-the-box with minimal effort. You simply pick images and text, and it generates the drawing animations automatically. It’s quite easy to use and you don’t need artistic skills to get a neat result – great for educational content that benefits from visuals being drawn step-by-step.
- Cons: The style can feel repetitive or outdated if overused. Essentially everything is “hand-drawn,” which might not fit all audiences (and some viewers are tired of seeing the same hand animation over and over). VideoScribe also requires installing software (no cloud editor), and it’s not as flexible for other animation styles. As a paid product, you’ll need a subscription (though they have a free trial). Alternatives: Doodly is another popular whiteboard animation tool (one-time purchase) which works similarly – easy but locked into the draw-on-whiteboard style.
Other Options:
There are many animation tools out there. For example, Biteable, Renderforest, and Canva’s video maker all let you create short explainer videos, often by combining stock footage or simple animations with text. If you need more advanced or unique animations (and have time to learn), you might consider Adobe After Effects or Blender, but those have a steep learning curve and aren’t beginner-oriented. For most people making tech explainers, a tool like Animaker or Powtoon will cover your needs without requiring animation expertise.
Video Editing Software
After recording your screencast or creating animation sequences, you’ll likely need to edit the video: cut out mistakes, add titles or zoom-ins, and generally polish it. The good news is you don’t need Hollywood-grade software for basic editing. There are plenty of easy editors perfect for educational content:
-
OpenShot (Free, Windows/Mac/Linux): An open-source video editor that’s very welcoming to beginners. It has a simple drag-and-drop timeline where you can trim clips, add music, insert titles, and apply basic transitions/effects.
- Pros: Completely free with no watermarks or time limits. It’s suitable for beginners and very friendly software anyone can use with minimal knowledge and still get good quality output. The interface is straightforward and supports unlimited tracks, so you can layer video, images, and audio.
- Cons: Not as optimized or stable as some paid software. Some users experience crashes or glitches, especially on longer projects. Lacks advanced features like color grading or complex effects which are best for straight cuts and simple titles.
-
iMovie (Free, Mac/iOS): Apple’s easy-to-use video editor that comes pre-installed on Macs and available on iPhone/iPad. It’s perfectly capable for tutorial videos.
- Pros: User-friendly interface with a gentle learning curve. Offers templates for intros and trailers, plus features like picture-in-picture and split-screen. Integrates with Photos and iTunes for easy media access. Free for Mac users.
- Cons: Mac-only. Its simplicity means limited advanced editing options. No multi-cam support or detailed audio tools, which may limit growing needs.
-
Wondershare Filmora (Freemium/Paid, Windows/Mac): A paid editor with a clean interface and lots of built-in effects, transitions, and even AI tools.
- Pros: Beginner-friendly and easy to learn. Includes screen recording, split-screen presets, and a library of royalty-free music and effects. Runs well on modest hardware and is affordable compared to pro software.
- Cons: Free trial includes a large watermark. Some users report slow exports with heavy effects. Lacks fine-tuned control for advanced editing like color correction or compositing.
-
DaVinci Resolve (Free/Paid, Windows/Mac/Linux): A professional-grade editing suite used in Hollywood that also offers a powerful free version.
- Pros: Extremely feature-rich: includes editing, color correction, audio editing, and VFX in one app. Great for high-quality polish and multi-platform. Free version offers nearly all pro features.
- Cons: Steep learning curve due to its complexity. Divided into pages (Edit, Fusion, Color, etc.), which can be overwhelming. Needs a decent computer (especially GPU). The Studio version ($295) adds more features but isn’t needed for most tutorials.
Other Editors Worth Noting:
- Shotcut (Free) – Another open-source editor, often more stable than OpenShot.
- Clipchamp (Free/Paid) – Browser-based and included with Windows 11, great for quick edits with templates.
- Adobe Premiere Rush (Freemium) – A simplified version of Premiere for desktop and mobile, aimed at casual users.
- WeVideo (Cloud, Freemium) – Online editor good for Chromebooks and collaboration; free tier is limited.
- CapCut (Free) – Excellent mobile and desktop editor with many effects, backed by TikTok.
- InShot – Popular mobile editor with solid editing features on the go.
The key is to choose an editor that matches your comfort level. You can always start simple and “graduate” to a more advanced tool as your video editing chops grow.
Voiceover and Audio Tools
Clear, crisp narration is the backbone of a good technical video. Even if your content is great, bad audio can turn viewers off fast. The tools in this category help you record and refine your voiceover:
-
Audacity (Free, Windows/Mac/Linux); The go-to free audio editor that’s been around for ages. Audacity is perfect for recording your voiceover and doing basic editing and cleanup.
- Pros: Full-featured audio editor despite being free. You can record multiple takes and edit on a multi-track timeline. Includes effects like noise reduction and compression/EQ. Lightweight and compatible with most systems. Ideal for professional-quality voiceovers without cost.
- Cons: Outdated interface that may overwhelm beginners. No real-time preview for effects. Lacks official support, though community help is abundant. Moderate learning curve, but usable for basic tasks.
-
Descript (Freemium, Windows/Mac): A unique audio/video editor that uses transcription. You edit your audio by editing its text transcription.
- Pros: Extremely user-friendly and innovative. Remove filler words with one click. Studio Sound AI enhances clarity. Overdub allows minor voice edits using AI voice cloning. Great for fast cleanup and narration fixes. Free tier available.
- Cons: Limited free transcription time. Requires internet for most processing. Not a full DAW, so advanced mixing requires export. AI transcription may need manual corrections.
-
Ocenaudio (Free, Windows/Mac/Linux): A simpler, modern-looking alternative to Audacity with real-time effects and a clean interface.
- Pros: Intuitive design with real-time effect previews. Ideal for single-track editing like narration. Supports VST plugins and handles large files well.
- Cons: No multi-track editing. Limited feature set compared to Audacity. Best for quick voice edits, not full production projects.
Other Audio Tools:
- Adobe Audition – Powerful pro-grade audio editor in Adobe Creative Cloud. Best for advanced users; pricey and has a learning curve.
- GarageBand (Free, Mac) – Music-oriented, but usable for voiceovers with a mic track and effects.
- Murf.ai / ElevenLabs – AI-powered text-to-speech tools that create synthetic voiceovers. Useful if you can’t record your own, but may sound robotic and cost money for commercial use.
Tip: No matter what software you use, a good microphone will improve quality more than anything. A USB mic like the Blue Yeti or even a decent headset mic can work well. Avoid using your laptop’s built-in mic, which tends to capture unwanted background noise. Record in a quiet, echo-free room; soft materials like pillows can help dampen sound. While software like Audacity can clean up your audio, starting with a clean recording makes everything easier.
Scripting and Planning Tools
Before you hit the record button, it pays to plan out your tutorial. Scripting what you’ll say or creating a storyboard for visuals will save you time in production and result in a clearer video. Here are some tools to help organize your ideas:
- Google Docs or Notion (Free): For many creators, the simplest “tool” for scripting is a good old document. Google Docs works wonderfully for scripting or outlining (with real-time collaboration). Notion is also great for planning. Organize your script, checklist, images, and research notes all in one flexible workspace.
-
Storyboarder by Wonder Unit (Free, Windows/Mac): A desktop app for storyboarding your video. Ideal for planning shots if your video includes slides, screencasts, or camera footage.
- Pros: Lets you time panels, add notes/dialogue, and export to PDF or images. Syncs with Photoshop for advanced drawing. Great for visual thinkers.
- Cons: No real-time collaboration. Drawing required (even simple stick figures). Not cloud-based, so sharing requires manual export.
-
Canva (Storyboard Templates) (Freemium, Web): Offers drag-and-drop storyboard templates to arrange screenshots and notes visually.
- Pros: Easy to use, web-based, and polished. Great for presenting plans to a team. Collaborate easily and access a large asset library, including AI-generated visuals.
- Cons: Limited assets on the free plan. Less specialized than dedicated storyboard software. Doesn’t create animatics or videos, just static storyboards.
-
Trello or Milanote (Freemium): Project-style planning tools. Trello uses boards and lists to track progress, while Milanote is a creative canvas to layout ideas visually.
- Pros: Ideal for organizing complex projects. Trello helps track sections and checklists. Milanote is great for nonlinear or creative planning workflows.
- Cons: Not video-specific – lacks script timing or video features. Best used if they match your personal planning style.
Remember: The goal of scripting/storyboarding is to save time later. Even a brief outline can eliminate “ummm what next” moments while recording. A script (even loosely followed) ensures clarity. If you script fully, a teleprompter app (mobile or desktop) can help you stay on track while recording without your eyes shifting off camera.
Once your tutorial video is edited and ready, you need to share it with your audience. The choice of platform will affect who can see it, how easily it’s discovered, and the viewing experience. Here are the best platforms for hosting and promoting technical videos:
-
YouTube (Free): The king of video sharing. YouTube is usually the first choice for hosting tutorial content aimed at a general audience.
- Pros: Massive reach with over 2 billion monthly users. Great for discoverability via search and recommendations. Free uploads, with community features like comments and likes. Monetization options through ads once your channel grows.
- Cons: Includes ads and post-video distractions (suggested videos). Limited player customization. High competition, so standing out requires good SEO, thumbnails, and engagement strategy.
-
Vimeo (Freemium): Known for clean, professional playback. Ideal for embedding on websites and client-facing content.
- Pros: Higher video quality and ad-free playback. Excellent for embedding, with customizable players and privacy controls. Great for formal training or polished presentations.
- Cons: Smaller platform with limited audience reach. Free plan is restrictive (storage/upload limits). Paid plans are relatively expensive for casual creators.
-
Loom (Freemium): Also a recording tool, Loom automatically hosts your video for quick sharing. Ideal for internal or client-specific tutorials. Not optimized for public discovery, but great for embedding in documentation or knowledge bases.
- Pros: Instant hosting and sharing after recording. Viewers can interact with comments and reactions. Useful engagement analytics for internal sharing.
- Cons: Free plan has limits on video count and length. Not suitable for mass distribution. Limited viewer access unless explicitly shared.
- Self-Hosting or Other Platforms: If you have a personal or company website and want full control, you could host videos there, but it’s generally not recommended due to bandwidth issues and lack of a robust player (it’s better to embed a YouTube/Vimeo video in your site). There are also niche platforms like Wistia and Brightcove aimed at businesses with marketing analytics, but those are expensive and likely overkill for most individuals. If your tutorials are part of a course or training program, platforms like Udemy, Skillshare, or Teachable might be relevant. They host your videos but in the context of an online course you create. However, for general free tutorials, YouTube combined with perhaps a blog post (for supplemental text and images) is often the most effective way to reach a broad audience.
(Note: Cost is indicated in a general sense: Free, Freemium (free with paid upgrades), or Paid. “Paid ($$)” implies a significant one-time or subscription cost. Always check the latest pricing as these can change.)
Conclusion
Creating a high-quality technical tutorial video is a journey through multiple stages: planning your content, recording visuals, editing, voiceover, and finally sharing it. Thankfully, you don’t need a Hollywood studio to do all this. The tools we discussed are well-suited for beginners and enthusiasts, and many won’t cost you a dime.
As you start out, pick one tool from each category that feels comfortable and just start creating. For instance, you might script an outline in Google Docs, record your screen with OBS Studio, edit the footage in OpenShot, clean up your audio in Audacity, and upload to YouTube. As you gain experience (and if your budget grows), you can step up to more advanced options (maybe Camtasia for recording/editing in one, or upgrading from OpenShot to Resolve for finer edits).
Remember, the content and clarity of your teaching matter most – the tools are there to support you, not overshadow the tutorial. Focus on explaining your software or concept in a way that’s easy to follow. Use annotations, zooms, and visuals to highlight important points (most screen recorders/editors have features for this). Keep your voiceover clear and paced; a good microphone and a bit of noise removal help, but speaking slowly and confidently is even more important.
Finally, when your video is done, share it wherever it can reach the people who need it. If it’s a broad topic, YouTube is your friend. If it’s a specific client or classroom, maybe a private Vimeo or Loom share is enough. Don’t forget to promote your video: a post on relevant forums or a write-up on your blog with the video embedded can drive more viewers.
Happy video making! With these tools in your toolkit, you’re well-equipped to create technical tutorials that inform and impress. Now go turn that expertise into an awesome video!
You May Also Like
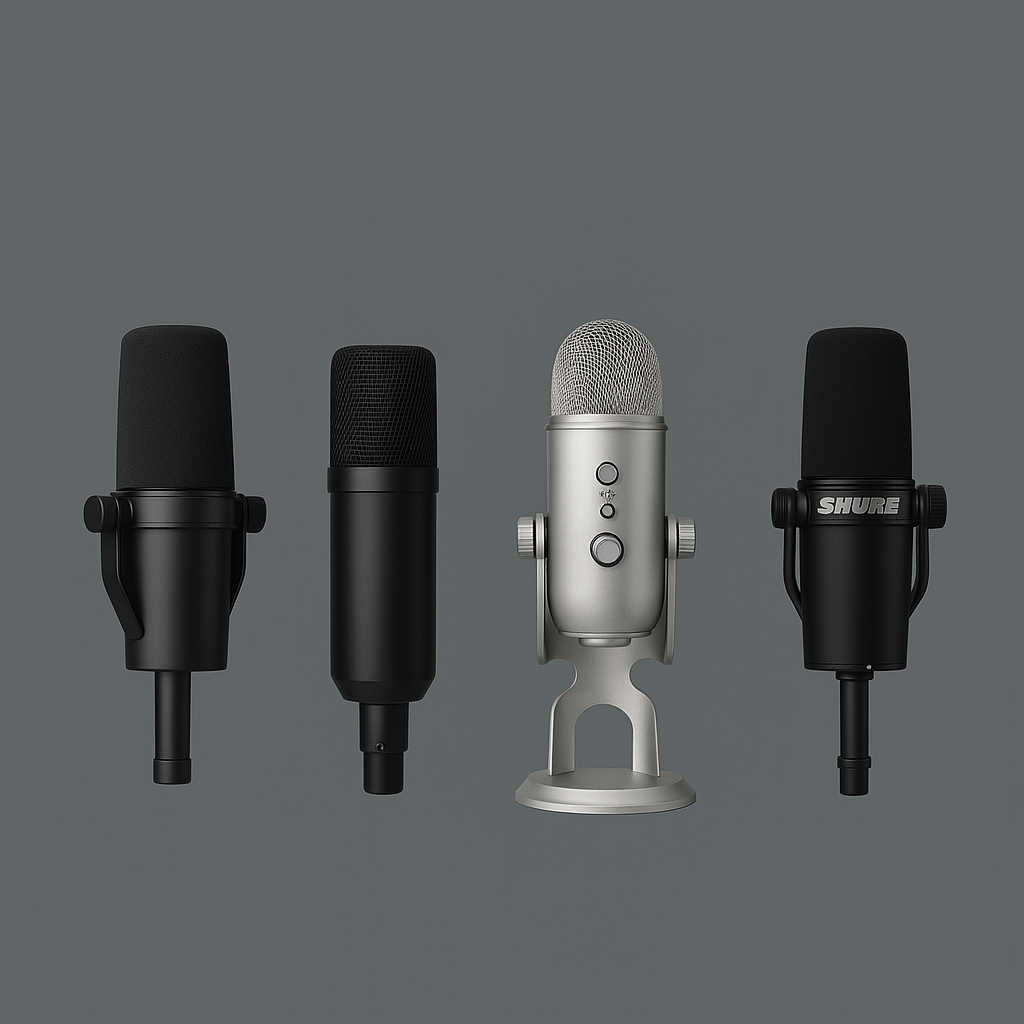
How to Choose the Right Microphone for Streaming, Podcasts & YouTube
Whether you're aiming to be the next podcasting sensation, a YouTube star, or a streaming guru, one thing's for sure: you're going to need a good microphone

Best Cameras for YouTubers and Streamers in 2025
in 2025, the camera options for creators are seriously impressive. Whether you’re livestreaming gaming marathons or building a YouTube empire from your bedroom, there’s a camera that fits your style and budget. Here are my top picks after diving into specs, real-world use, and yes, learning a few things the hard way.